I’m just about to go on an international trip to Japan, and as I was planning what to pack for the trip, I realised that I needed some padded cases for my Kindle and Macbook. There’s always a chance of damage when you’re carting around these devices in a backpack, and I don’t want my expensive gear getting beat up along the way.
Why buy these products when I’m perfectly capable of making them myself, I thought. Especially as I’ve made padded items before that were soft enough to lay my baby down on–surely a similar method could be used to protect my precious electronics.
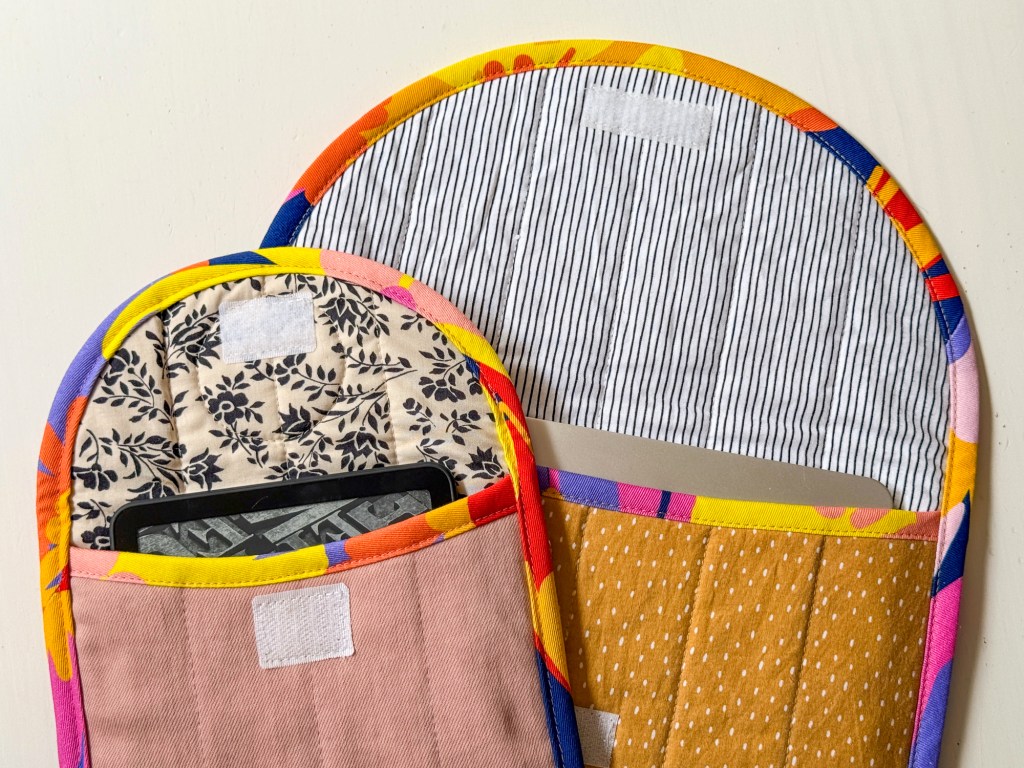
My new Kindle pouch was made from a pink denim upcycled from a pair of thrifted pants, and the laptop sleeve using a thrifted bed sheet. Both featured a patterned lightweight cotton lining, and some cute multi-coloured bias binding that I made myself (tutorial on this still to come!).
The magic behind this electronics pouch sewing tutorial is that it can produce a padded case for literally any device that is a reasonably flat rectanglar shape –anything from a smartphone to a laptop will fit!
Creating your pattern:
Because all devices are different sizes, we need to make a pattern that fits your device exactly.
First, we need to do some math. Don’t be scared! As long as you have the dimensions of your device and a calculator handy, it’ll be easy enough to figure out how to create your pattern.
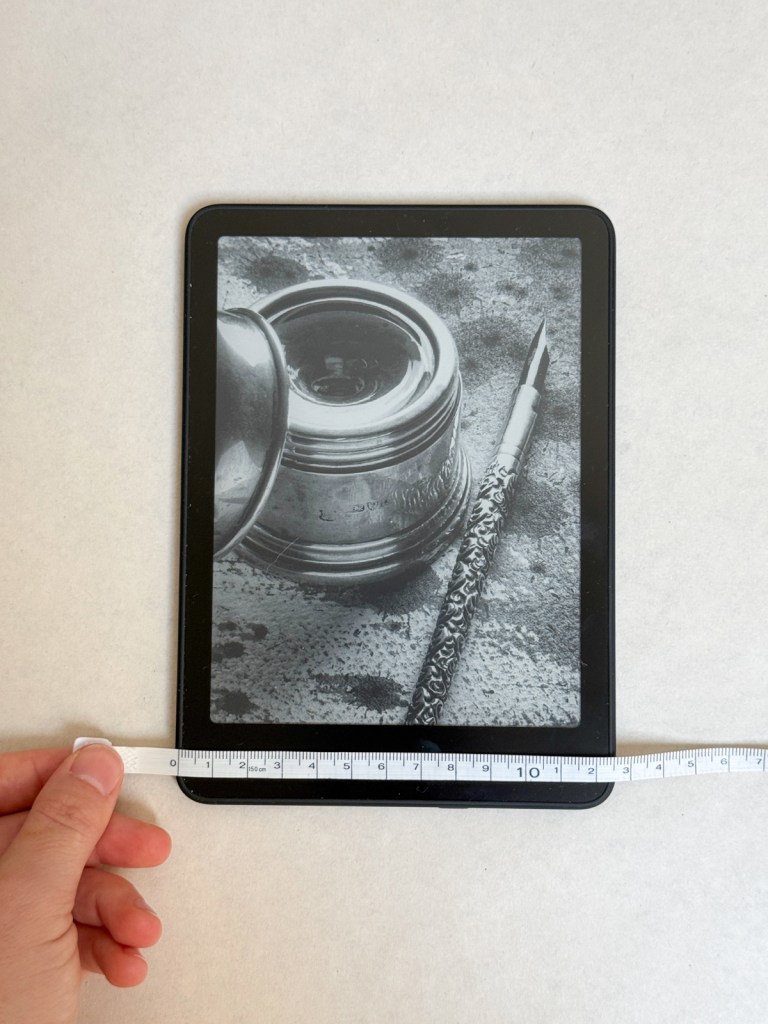
Measure your device length (L), width (W), and height (H) in either centimeters or inches.
I’ll be using my new e-reader as an example in this post. It has the dimensions 12.7 cm W x 17.7 cm L x .7 cm H.
To calculate your pouch width (ie. the shorter side), the calculation goes as follows:
W + H + 4cm (1 5/8 in.)
The additional 4cm (1 5/8 in.) includes an allowance for the binding and leaves some extra space so that your device has room to move, so it won’t feel too tight pulling it in or out.
Once you have the pouch width, you can figure out the pouch length. The calculation is:
Lx2 + Hx2 + half of pouch width + 1 cm (3/8 in.)
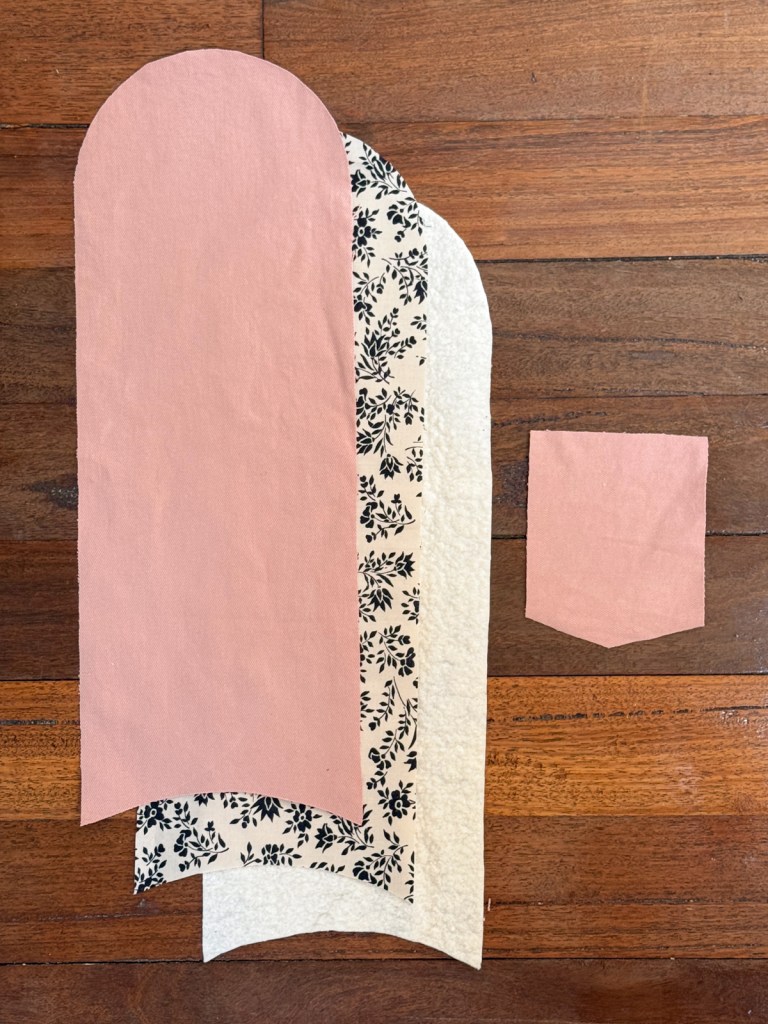
You should now have a long rectangle.
To create the rounded flap at one end, I traced around a circular plant pot tray that had nearly the same diameter as the pouch width. Ideally you want to find something circular that matches the width exactly. See what you can find around the house. Once you’ve found something, place it at one end of your rectangle and trace around the edge to make a smooth half-circle.
I also brought in the other end of my pattern so that my device is easier to grab when the pouch is opened, though this is optional. I used a large dinner plate to make a rounded indent, coming in by just 2cm in the centre. If your pouch is for something bigger like a laptop, you may need to trace the indent manually by hand.
If you’re making a pouch for an e-reader, like I did, then I am conveniently creating a printable pattern available in my Etsy shop that you can download and print at home, saving you from having to do any complicated math or pattern-making! If you want a printable pattern for any other type of device, please let me know in the comments and I’ll consider creating one 🙂
What you’ll need/supplies:
Outer fabric:
For the exterior of pouch, use a light or midweight woven cotton (duck, drill, canvas, etc. Even a non-stretch denim will work.
Batting:
To make the pouch more padded, use a lightweight quilt batting (alternatively you could use a layer of thick fleece).
Lining fabric:
For interior side of pouch, use a lightweight woven cotton. Make it something soft that will not scratch up your device.
Binding fabric:
For bias binding, use a lightweight woven cotton (alternatively, you can use a pre-purchased extra wide double fold bias tape).
Other:
Hook & Loop/Velcro – 5 cm (2 in.) length.
Elastic strip – approx 2 cm. wide.
Matching threads for outer, binding & lining fabrics, and Hook & Loop.
Tailors chalk
Pins or quilting clips
Sewing instructions:
Quilt your pieces
For quilting, you can do this is any way you want. I replicated the quilting method from my baby change mat sewing pattern, which is just to sew a few simple straight lines down the middle.
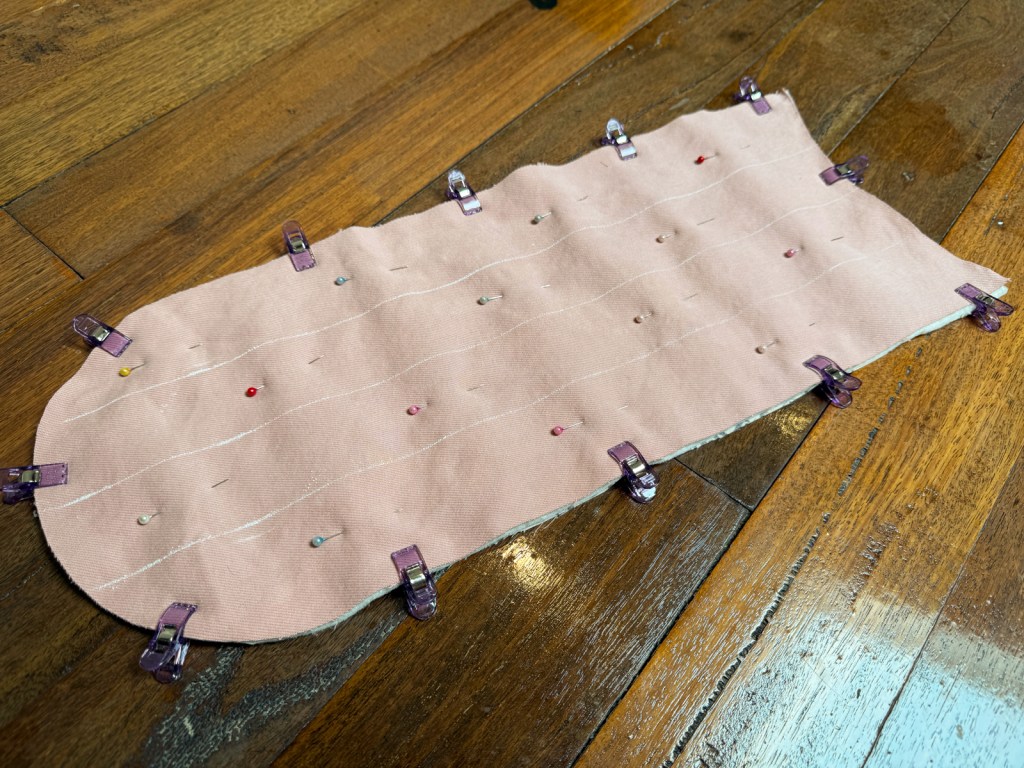
On outer fabric, measure the centre line 8.7 cm (3 3/8 in.) from either edge and mark the line with tailor’s chalk or a fabric pencil.
Mark another line each side of the centre line, spaced 4 cm (1 5/8 in.) from the centre line, until you have 3 lines total.
Place the lining fabric right side down, then the batting on top. Place outer fabric with right side up on top of batting (this creates a sandwich with right sides of the lining and outer fabrics facing out).
Pin/clip together around the edges as well as a few pins in the middle to hold everything in place, then stitch along the 3 chalk lines.
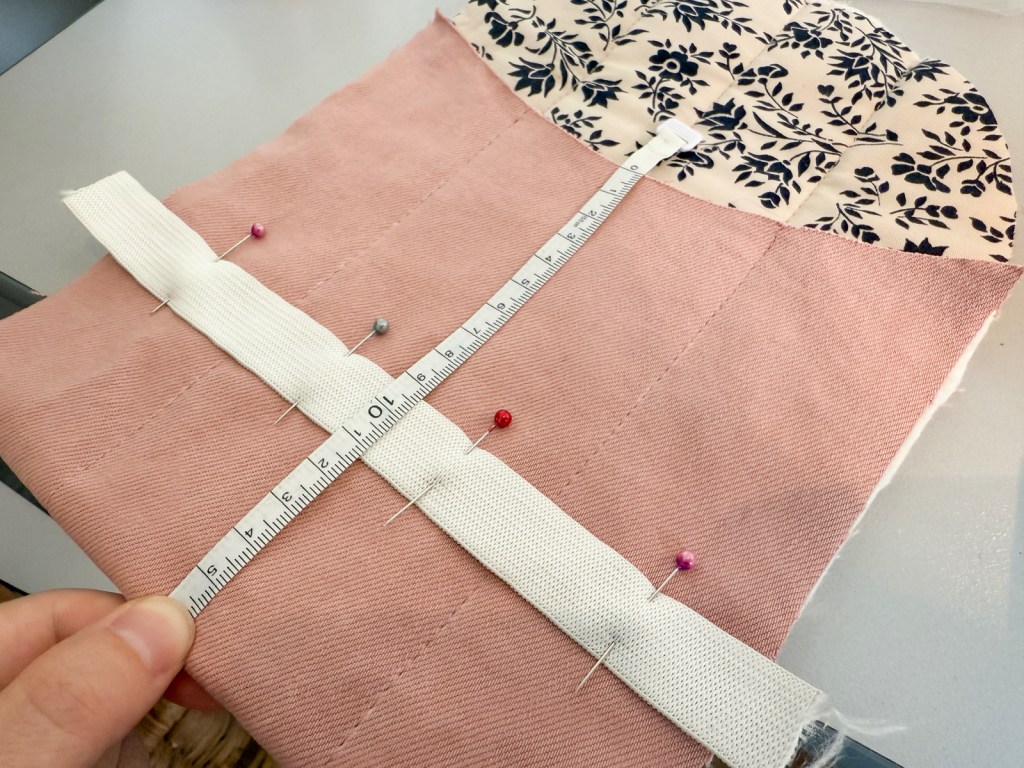
Attach elastic (optional)
I added a piece of elastic, the same length as the width of my pouch. This is for storing a charging cable or other odds and ends by tucking it into the elastic.
Place about 9-10 cm (4 in.) from the short edge of your pouch, secure in place with a small basting stitch at each edge (within the seam allowance). Add a line of stitching directly over the top of each quilting line.
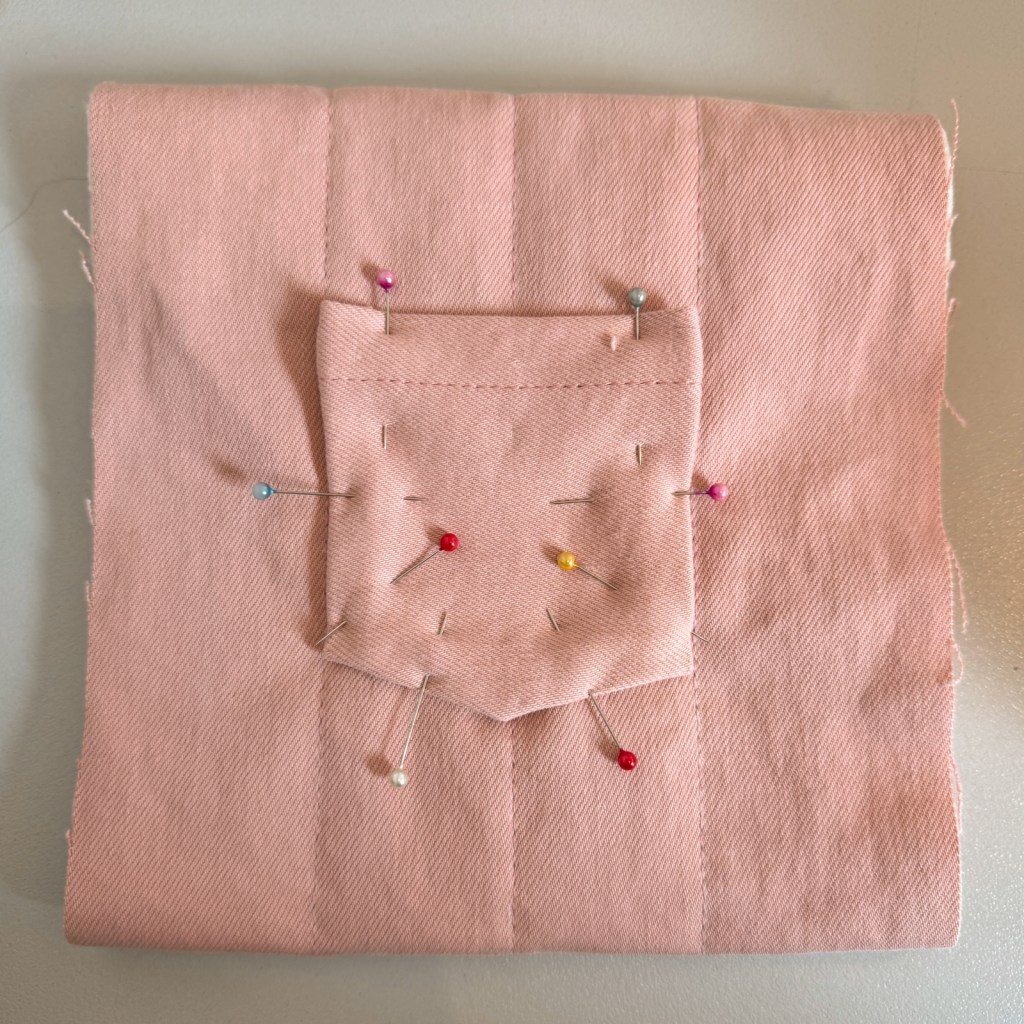
Add patch pocket (optional)
I wanted to make a small pocket for the outside of the pouch for storing odds and ends, so I borrowed the pocket from my baby shorts sewing pattern and traced the smallest size.
I used the baby-size pocket for my device pouch as it’s for a small e-reader, but if you have a larger device like a laptop, you’ll have room for a big pocket (or even multiple pockets!).
Press top edge of pocket down by 1 cm (3/8 in.) towards the wrong side, and again by 1.5 cm (5/8 in.). Stitch in place. Press side and bottom edges of pocket by 1 cm (3/8 in.) towards the wrong side.
Place pocket in position. I folded my pouch to mimick the finished product, then centered the pocket on the back side of the pouch. Pin to secure. Stitch along sides and bottom of the pocket.
Amazingly, my pocket ended up fitting nearly exactly along the outer two quilting lines, but don’t worry if your looks a little different to mine.
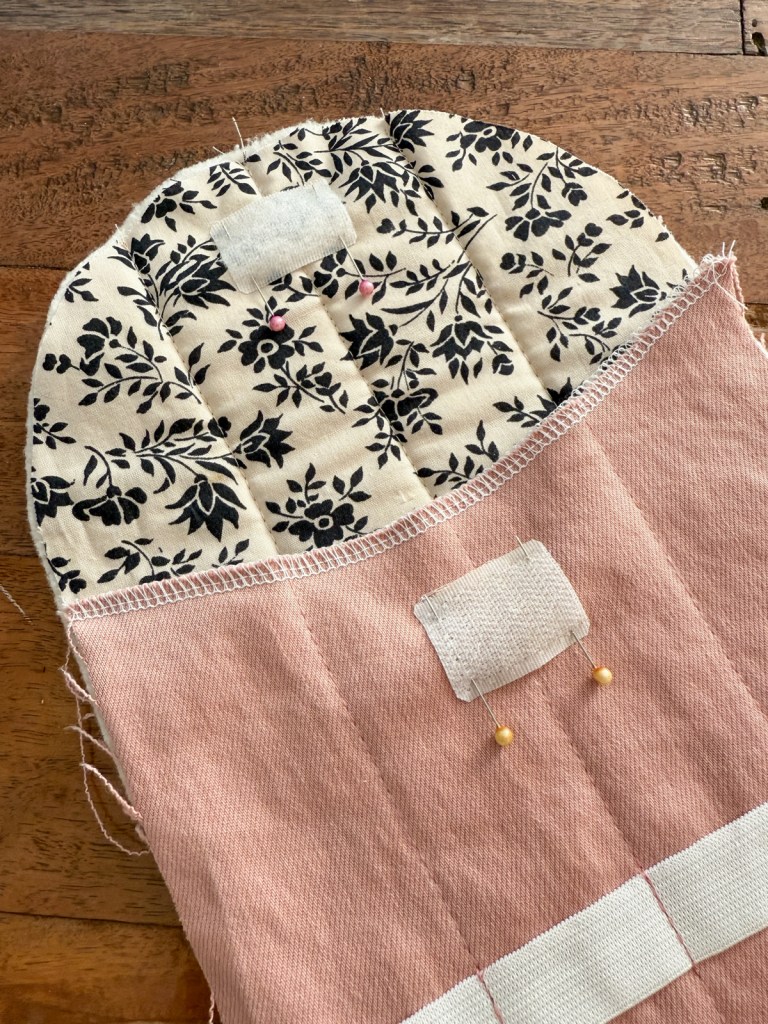
Attach the Hook & Loop/Velcro closure
I spaced my Hook & Loop/Velcro closure about 2cm from the top and bottom edges. The Hook & Loop/Velcro on the top (inside of the flap) should be on the lining side, and at the opposite end of the pouch, the Hook & Loop/Velcro should be on the exterior side. Secure each in place with a box of stitches around the edge.
At this point I also added a decorative embroidered patch to my flap, which I thought made the whole pouch more fun-looking. Whether you want to do something like this or not is up to you. I made sure to leave enough space between the edge of my patch and the edge of my flap to attach the bias binding.

Attach bias binding
I used my serger to finish the raw edges before this step. This is not essential, but I find that securing the layers of fabric together helps with reducing fabric movement when you get to attaching the binding.
Attach bias binding to the short edge. I’m going to put together a bias binding guide for more info on making your own binding and instructions on how to attach it to your project. Sit tight for this one!
After you’ve attached your binding to the short edge, fold your pouch into its finished shape, and pin in place.
It’s a good idea to test the main pocket size with your electronic device inside at this stage, to make sure you’ve got the fit right before sewing it all together. When I did this, I realized that my velcro fastenings were misaligned by about 0.5 cm (which might not bother some people, but it definitely bothered me!), so I unpicked one side and moved it up so that both sides would match perfectly when the flap was closed.
Secure along both side edges with a basting stitch within the seam allowance (about 0.5cm from edge).
Attach your bias tape around the remaining exposed edge, finishing neatly with a fold at each end.
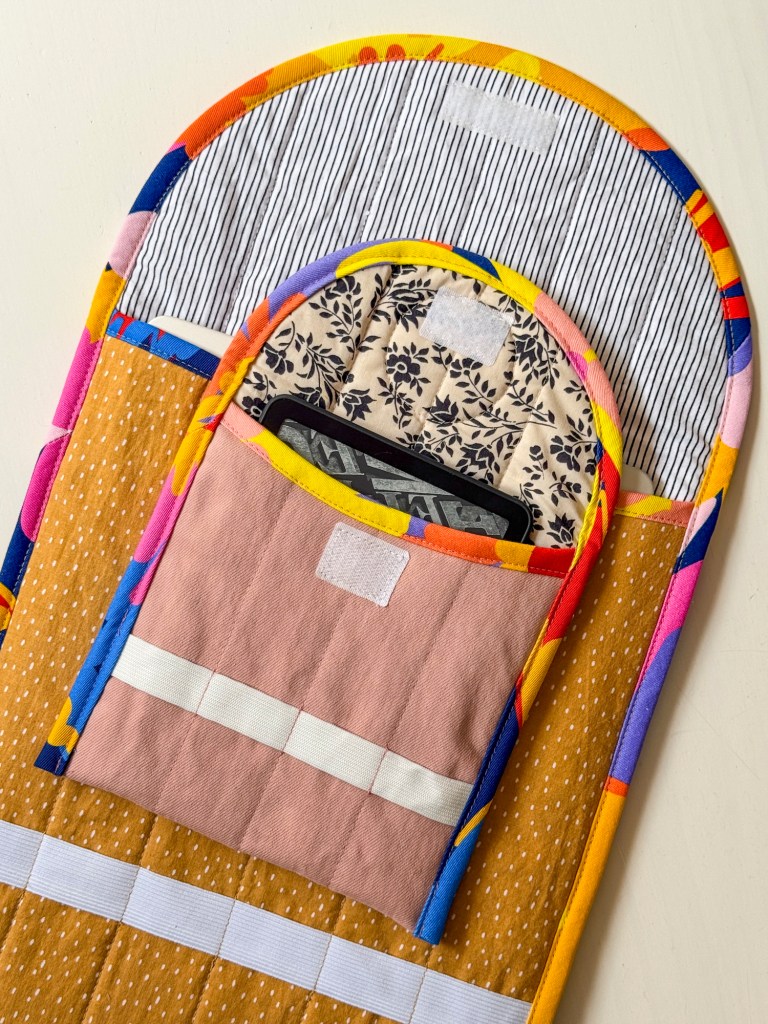
And you’re done! I was super happy with how my DIY laptop sleeve and Kindle pouch turned out, and they did a great job of protecting my devices from damage while travelling.
Let me know if you make one of your own – I’d love to know how it turned out!

Leave a comment